lunes, 28 de marzo de 2016

How to get higher marks at exams!

Have you got an important test coming up that you really want to ace? Do you generally want to improve your grades? There are a number of tricks and practices which can significantly improve your chances of scoring high on a test. This article will help you in studying, analyzing and solving exam questions, so read on!

Method 1Absorbing Knowledge Efficiently 
 

  1. Image titled Get a Teaching Certificate in Texas Step 6
    1
    Pay attention in your classes. The best thing you can do to raise your test scores is to pay attention when you're supposed to be learning the material: in class! Letting your mind wander or not showing up at all are both likely to make you miss out on key information that will later appear on tests.
  2. Image titled Get a Scholarship Step 16
    2
    Take good notes. This is important if you want to have an easier time studying later. Not only will writing the information down as you learn it help you in absorbing the information and paying attention, but you'll have a reference for when you go to study later.
  3. Image titled Get Higher Marks in Exam Step 3
    3
    Do your homework. Homework, such as assignments and at-home reading are where you will find the rest of the information that will be on tests, so doing this homework is important. Schedule time and set aside a quiet place just for homework to help beat the procrastination blues.
  4. Image titled Get Higher Marks in Exam Step 4
    4
    Use mnemonics and other tricks. Various memory tricks really can be useful for remembering certain things like numbers, categories, and lists. Just make sure that you learn them correctly and don't mix them up!
    • Mnemonics are phrases which can help you remember the order of certain things. For example, "Katy Perry Came Over For Great Songs" is a great way to remember the biological classifications (Kingdom, Phylum, Class, Order, Family, Genus, Species).
    • Another memory trick is if you have to remember a string of numbers. Instead of trying to remember 2537610925, for example, break it up like a phone number: 253-761-0925. You can break up dates this way too. 14 Oct 1066 (the Battle of Hastings) can become a locker combination: 14-10-66.
  5. Image titled Get Higher Marks in Exam Step 5
    5
    Do practice tests. Ask your teacher or go online and print a few practice tests. Taking a practice test will help you figure out how much information you actually know vs how much information you think you know. Knowing your weak spots before a test is crucial!

Method 2
EditStudying Like a Pro

  1. Image titled Learn Quickly when Reading Step 5
    1
    Study frequently. Studying hard for only a few hours the night before the test isn't going to help ensure perfect scores. If you really want to ace those exams, study old and new material every day, or at least several times a week. This will make test-taking a breeze.
    • Take study breaks. When you study, make sure you take a 5-10 minute break after every 30 minutes of study. This will help keep your brain from getting overloaded and give it more time to absorb the information.
    • On study breaks, try not to fill your brain with more information, even if that information is more about your favourite celebrity's latest concert rather than Winston Churchill's foreign policy.
  2. Image titled Get Straight "A"s Step 1
    2
    Study according to your learning style. You may know that different people have different learning styles. Some people are visual learners, some people prefer sound, some need physical motion, and so on. Know how you learn best and work that into how you study.
    • For example, if you learn better by physically doing things, try walking around while you study. If you learn better with sounds associated with the information, listen to music while you study. If you're a visual learner, make a chart of the information you have to know.
  3. Image titled Get Higher Marks in Exam Step 8
    3
    Take advantage of sense memory. Your brain is pretty good at associating smells or sounds with ideas or memories. You should take advantage of this! While you're studying, wear some unusual cologne or perfume (with a smell you don't usually encounter) and then expose yourself to that smell again right before or during a test.
  4. Image titled Get Higher Marks in Exam Step 9
    4
    Listen to music. Your teacher probably won't let you have headphones during a test, but you should at least listen to music, specifically classical music, right before taking a test.[1] Studies have proven that exposure to certain types of music right before rigorous mental activity can really help, by waking up your brain and increasing your awareness.

Method 3
EditPreparing Your Body

  1. Image titled Get Higher Marks in Exam Step 10
    1
    Eat right. The most important thing is to eat, full stop. Being hungry during a test will distract you and make you tired. Don't eat too soon before a test though, as some foods can make you tired. Instead, make sure you get a meal filled with lean protein before you have to take a test.
    • Eating healthy will generally boost brain performance too, so make sure you're always eating a healthy diet to help you learn all through school.
  2. Image titled Pass the Bar Exam Step 8
    2
    Sleep well. If you don't sleep you won't be able to focus when the pressure's on! Make sure to go to bed early the night before a test, rather than staying up all night to study. Your brain won't be able to hold on to all that crammed information anyway.
  3. Image titled Have Fun While Studying Step 7
    3
    Have all the necessary supplies. Go to your test with all of the calculators, pens, pencils, blank paper, and other supplies you might need. Not having these things could mean you'll have a much harder time!
  4. Image titled Get Higher Marks in Exam Step 13
    4
    Drink lots of water. Getting dehydrated during a test can be distracting and reduce your ability to think clearly. Stay hydrated before your test and bring a bottle of water with you to the test as well.
  5. Image titled Get Higher Marks in Exam Step 14
    5
    Don't do anything different. If you aren't used to drinking coffee, now is a bad time to start. Try not to do anything different in your basic routine the day of or the night before the test. This can really throw you off.

Method 4
EditAcing the Test

  1. Image titled Get Straight "A"s Step 11
    1
    Write important things down first. As soon as the test starts, write down all formulas or other important information on some scratch paper before you start going through the questions. This will help keep you from blanking when you need that information later.
  2. Image titled Get Higher Marks in Exam Step 16
    2
    Do the problems you know first. Always do the fast, easy problems to which you know the answer first. This will help make sure that you get as much of the test done as possible. If you get stuck, just move on to the next problem that you can answer quickly.
  3. Image titled Get Higher Marks in Exam Step 17
    3
    Cross out the wrong answers. Once you've answered the questions you know, move on to the ones you're not sure about. When you're dealing with multiple choice questions, eliminating answers that you know are impossible or silly will help you better decide between the possible options.
  4. Image titled Succeed at Psychometric Tests Step 4
    4
    Look for clues in the other questions. Sometimes the answer to a question can be contained within or hinted at in another question on the test. Look at other answers or questions to help jog your memory.
  5. Image titled Get Straight "A"s Step 20
    5
    Never leave questions blank. Unless you're docked for incorrect answers, never just leave a question blank. Especially if it's multiple choice; you'll at least have a 25% chance of getting the right answer.
    • As mentioned above, this is where eliminating wrong answers will come in handy.
  6. Image titled Get Higher Marks in Exam Step 20
    6
    Pace yourself. This is important! Always keep track of how much time you have and try to use your time wisely. You can always go back to check or improve your answers later!

Must-See October Events in Vancouver

Must-See October Events in Vancouver

October in Vancouver means more than just the beginning of fall, it means film and writing festivals, Halloween, Thanksgiving and much more. Check out our list of Must-See October events in Vancouver!

1. Vancouver International Film Festival (September 24th – October 9th)

VIFF on GranvilleThis festival has been running since September 24th, but you can still catch up and enjoy it! It’s the 34th edition of the VIFF where some of the greatest movies from over 70 countries around the world are screened.

2. Oktoberfest at Harvest Haus (October 1st to 11th)

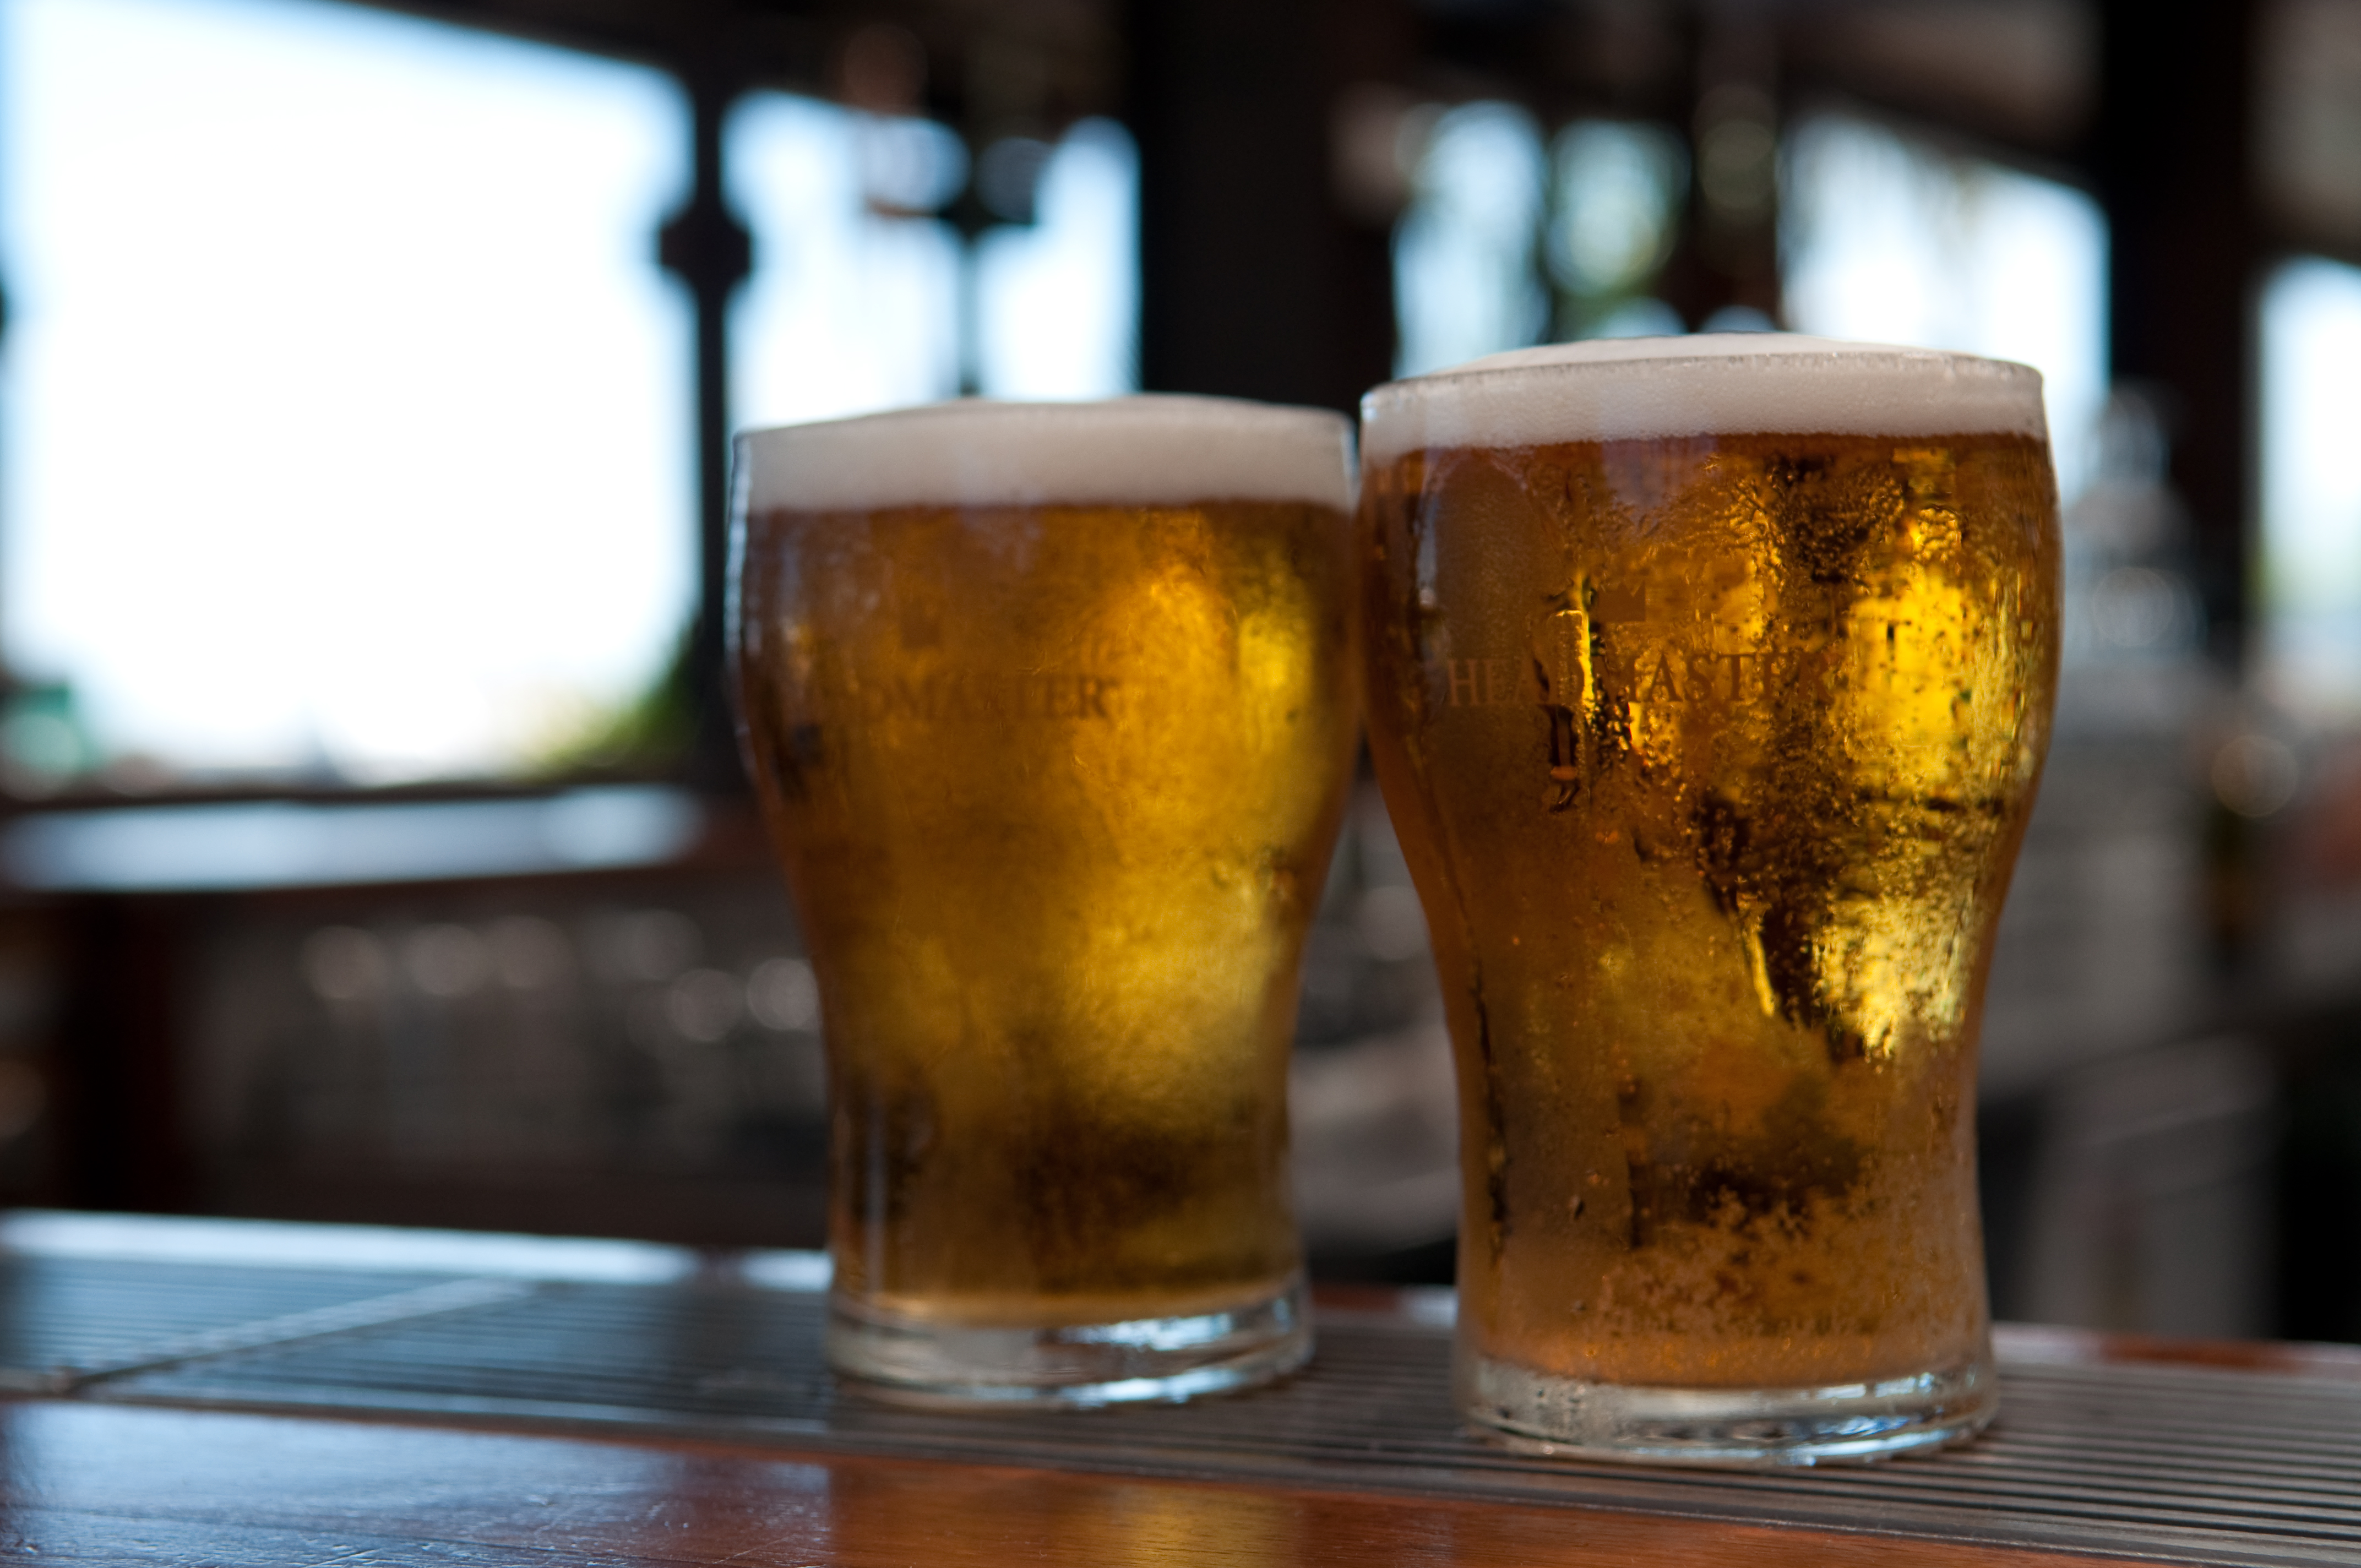
BeerLet’s welcome Munich in Vancouver at The Harvest Haus Oktoberfest Festival! If you want to have a great German experience, eat great food, enjoy delicious beer, and listen to awesome DJ’s this will be a fantastic event for you.

3. Thanksgiving in Vancouver (October 12th)

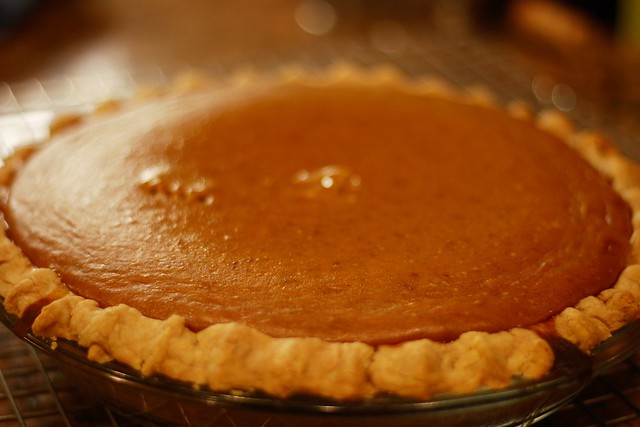
Pumpkin Pie from a *real* pumpkinThanksgiving is a statutory holiday celebrated annually on the second Monday of October in Canada. This day is mostly celebrated at home with families or friends. A very important part of the celebration is the Thanksgiving dinner of turkey, cranberry sauce and pumpkin pie! Come to the Vancouver Farmers Markets to buy fresh ingredients for your Thanksgiving dinner!

4. Vancouver Halloween Parade and Expo (October 15th to 18th)

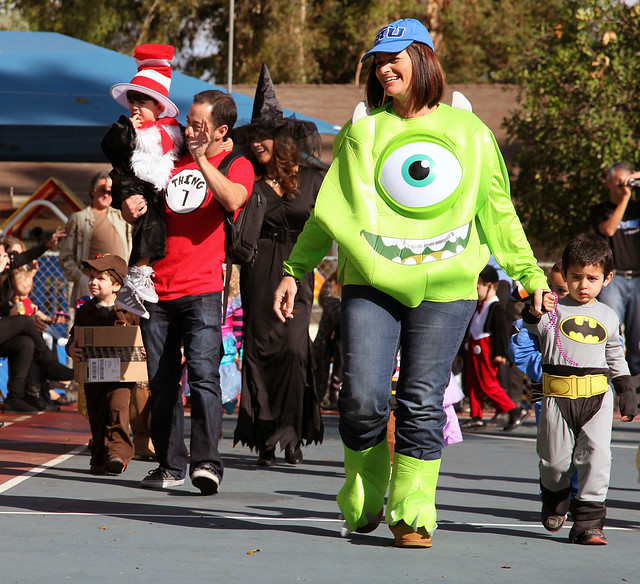
IMG_6942Halloween in Vancouver is not only about October 31st, it is celebrated throughout the whole month! Come see the Vancouver Halloween Parade and Expo from Granville St. to Downtown Vancouver. This parade was founded by a non-profit organization in collaboration with local artists, artisans and performers. It is possible thanks to the volunteers who donate their time and skills. Do not miss this event made with lots of love!

5. 2015 Vancouver Writers Fest (October 20th – October 25th)

I accidentally brought money to a book sale.
The Writers Fest is part of Vancouver’s cultural scene and it brings together writers and readers. This festival’s uniqueness comes from the variety of writers from all over the world! If you love to discover new books, this is a great opportunity for you to have a conversation with people who share the same passion as you.

Edit Article How to Be an Exotic Ethnic Girl

Ever felt jealous of those seductive, alluring island girls? Here is how to feel and be an exotic, ethnic girl of that type or, of any other ethnicity or type that is exotic to you. Remember, what is exotic to someone from for example Thailand, is very different from what someone from London would consider exotic. Get started at step number one below.

Steps

  1. Image titled Be an Exotic Ethnic Girl Step 1
    1
    Give your wardrobe a makeover. Fill it with ethnic clothes. Ethic, exotic girls' style is ethnic obviously, so you have to go for it. Shorts, miniskirts, loose trousers in earthy colors will do. As for shoes, wear anything you want in summer. In the winter you can wear leather boots with fur, or just plain Wellington boots.
  2. Image titled Be an Exotic Ethnic Girl Step 2
    2
    Buy wooden and leather jewelry. Put them on if you wish. Choose belts with Macramé patterns and beads, they are perfect.
  3. Image titled Be an Exotic Ethnic Girl Step 3
    3
    Grow your hair very long and wear flowers in it.
  4. Image titled Be an Exotic Ethnic Girl Step 4
    4
    Expose your shoulders, waist and legs. Not all at one time, of course.
  5. Image titled Be an Exotic Ethnic Girl Step 5
    5
    Start listening to the music of the world. Buy CDs with songs from other countries, such as Africa, Japan, India, Korea, etc.
  6. Image titled Be an Exotic Ethnic Girl Step 6
    6
    Practice being outgoing and friendly all the time. Smile and flirt a lot. Free yourself from the burdens of everyday life, and act like you live in a permanent summer, especially if you do. Try to transmit this feeling to everyone. People will feel nice having you around.
  7. Image titled Be an Exotic Ethnic Girl Step 7
    7
    Fall in love with somebody who came to your city/town/village as a tourist and develop some romance. Make sure he will never forget the time he spent with you. When he leaves, talk about it a lot and say romantic, sad things, such as: "It wasn't right for us to be separated... We are meant for each other... Now he is gone and he may never come here again...At least I have this bracelet he gave me." Get the people hooked on your story.

How to Become Truly Artsy Without Faking It

Want to become "artsy" without being called a wannabe or a poser? Follow these instructions and you will become a artsy person.

Steps

  1. Image titled Get Fit to Impress Step 4
    1
    Find your niche: This doesn't mean "artsy is my niche". Artsy is defined as someone who has an artistic background in a certain field.There are many types of art, just the basics are included. Michelangelo's main field was sculptures, he loved making them, however he did have a secondary field of painting.
    • Some of the fields are: Drawing, Chalk Art, Painting, Photography, Image doctoring (Photoshop), Music, Storytelling and Poetry. These are comprised into three main groups of art: Visual Arts, Musical Arts, and Written Arts. Try many different styles before picking which one best suites you.
  2. Image titled Be a Country Singer Step 4
    2
    Study the basics: Most instructions are strictly related to your choice of field, or niche. However, there are a few things that you should do no matter what field you are in. First thing to do is Google the terms used in your requested field. Also Google for tutorials to help you learn strategies to improve your skills. Once you get a handle on your chosen field, you can go talk to established local artists in your field and related art stores to ask more info.
    • For Drawing: First step in learning to draw, after or before you Google the previous step, is getting the tools. To start out, I suggest going cheep. Go to the dollar store and grab a sketch pad if you can, some pencils. But any other seems to be fine... use your own thoughts). Also keep dates on pictures you draw if you want to monitor your progress. Keep searching those tutorials for new or better methods. When you gather enough money, you could also go into art lessons either at a college or other places. Try the art galleries to see if they have connections to schools and drop in classes or learning annexes.
    • For Painting: First, get the tools. I suggest, as before, to start cheep until you feel confident enough to invest in yourself. Go to dollar stores to buy canvases, cheep brushes and pencils. For a smock (the clothes painters wear to not get paint on other things) use old clothing that you can get paint on. Then get some thinner (water based is water and oil based is paint thinner) If you want to pace yourself a bit more, try paint-by-numbers. but when you are done, start by sketching out what you want to paint, then paint within the lines, keeping lighter to darker, as it's easier to keep the colour consistent. After you become confident, try talking to people in the field, upgrading paints and brushes, and maybe investing in an easel. You might also try painting on other things than just canvas, however remember that whatever you paint on has its own qualities (absorbing the paint or the ability to use different types of paint) Also remember to paint in your name somewhere, and play with making it in a darker hue of the colour you are painting over.
    • For Photography: This one, I will give you more details on how to work it out. Most digital cameras shoot in .jpg format. This format is universal however harder to manipulate. If you are just shooting a photo album, and until you can afford the more expensive camera, by all means, use a common digital camera. But to make large pictures without that fuzzy blocks effect, try a more expensive camera and shooting in .raw format. This format does not compress the picture like a .jpg, so you won't get those blockiness. The last thing I would like to suggest to you is a way to make your pictures more artsy... Use angle shots and get a wall or big painted board to post your pictures one beside and below the other making what we call a montage. If you have smaller pictures, you can blur your eyes and see the main colour that the picture is, and use it to make an even bigger picture or theme.
    • For Image Doctoring: To do this, you need an image doctoring program like Photoshop. Also you need good pictures, so try taking pictures yourself. Use .raw format for your pictures to amplify your powers in editing. Search the net for tutorials and build up abilities.
    • For Music: Buy yourself an instrument and a book to learn and start learning, or go to a music teacher if you need that. To learn beats, try tapping your hands and/or feet to the beat of music, making a constant tap-pause-tap-pause-pause.
    • For Story Telling: Imagine what you want to hear. Think of each character like a person in your life, and how they would react to a situation. Write a skeleton (a brief first, second,...,last)Then try try to try until you write something you like.
    • For Poetry: Most poetry follows a small story or point. Use a rhyming dictionary like the one found on www.rhymezone.com and use that to follow a rhyming patterns. These are words that rhyme and are represented by a letter. "aabb" would be words that finish the first two lines rhyme and the next two lines rhyme. The whole thing should be constant, so "aabb" could be repeated or continued "ccdd".

10 Common English Baseball Idioms

10 Common English Baseball Idioms

If you go down to the Rogers Centre, beside the famous CN Tower, you’re likely to hear someone chanting “Let’s go Blue Jays!” What you might not know though, because of its popularity in North America, baseball has given English many popular expressions. Let’s take a look at some of the most common English idioms that have come to us from baseball.

1. Hit a home run: to succeed at something
    • EX: I think I really hit a home run on my math test yesterday.
Escobar rounds second after hitting a home run.
2. A ball park figure: an estimate or guess
  • EX: How many people were at the concert? Give me a ball park figure.
3. Strike out: to fail while giving your best effort
  • EX: He struck out on his graduate school applications. So he’ll try again next year.
4. Throw a curve ball: to surprise someone with something
that’s unpleasant to deal with
  • EX: She really threw me a curve ball when she told me last minute that she couldn’t drive me home.
5. Touch base: to talk briefly to someone.
    • EX: I have to go to an appointment, but let’s touch base tomorrow.
Matt Wieters, Melky Cabrera
6. On the ball: attentive and knowledgeable.
  • EX: Daniel is really on the ball today. He hasn’t made any mistakes.
7. Play hardball: to act aggressively and ruthlessly.
  • EX:  The tenants are playing hardball with their landlord, holding back on  payments they owe until the heating issue is fixed.
8. Step up to the plate: to take responsibility for doing something
  • EX: The company president stepped up to the plate and reimbursed  the workers for the accounting mismanagement.
9. Out of left field: suddenly from an unexpected source or direction
  • EX: Out of left field he just announced he was making a career change.
10. Right off the bat: instantly, immediately.
    • EX: I could tell they liked each other right off the bat.
Brett Lawrie

How to dress Vintage.

Wearing vintage clothing has never been so popular as it is today; with nearly a hundred years of style to choose from, there is a vintage look for everyone. Head to your local thrift shop or go 'shopping' in your grandmother's closet. Soon enough, you'll be creating perfect ensembles of modern and retro inspired clothing that will have all the local fashionistas swooning.

Part 1
Understanding Vintage Basics

  1. Image titled Dress Vintage Step 1
    1
    Choose items from a variety of eras. Vintage clothing, although there is no firm definition, is generally acknowledged as any clothing or accessory that was made in the 1980’s or earlier. Therefore, there is a huge selection of clothes to choose from in the ‘vintage’ category. Although it may be normal to gravitate towards one particular era, try mixing up your wardrobe with a variety of clothing periods. Wearing pieces that are all from the same era can make it look like you are in costume, rather than like you have a love for vintage.
    • The 1900’s were known for voluminous lace gowns, corsets, and collared tops.
    • The 1910’s brought about the trench coat and lace-up boots for women.
    • The 1920’s were famous for flapper and slip dresses in addition to glamorous beaded fascinators.
    • The 1930’s made wide brimmed hats and fur collars popular.
    • The 1940’s are known for cigarette-style pants, pastel sweaters, and halter tops.
    • The 1950’s made circle and poodle skirts, leather jackets, and unitards popular.
    • The 1960’s were known for bringing bell bottom jeans, paisley shirts, and peace signs into fashion.
    • The 1970’s brought denim and neutral tones into the spotlight, alongside pantsuits and leg warmers.
    • The 1980’s were famous for neon colors, shoulder pads, frilly and lacy tops, and tunics with leggings.[1]
  2. Image titled Dress Vintage Step 2
    2
    Mix and match vintage with modern. Although there are a select few people who can pull off an entirely vintage outfit, in order to keep your look chic rather than costume-y, it is important to keep your outfit about 50/50 modern and vintage. An easy way to think about it is: if you’re wearing a vintage top, throw on a pair of skinny jeans or modern pants. Vintage bottoms? Add a current shirt or sweater to balance the look. Dresses can be made more modern with the addition of modern accessories and hair styles.
    • Dressing in vintage doesn’t always have to be big pieces; wear a vintage scarf or piece of jewelry with an entirely modern outfit if you want.
    • When you get more comfortable in vintage, you may want to add more and more of it to your ensembles.
  3. Image titled Dress Vintage Step 3
    3
    Avoid wearing vintage in poor condition. Just because a piece is vintage, doesn’t mean that it’s in good condition (or style) to wear. If your vintage piece has any visible damage including stains, tears, or missing parts, it should be avoided until brought to a tailor or seamstress. Have all your vintage pieces dry-cleaned prior to wearing, as they often come with smells and wrinkles that are hard to get out on your own at home.
    • The same applies for wearing vintage pieces that are clearly not your size.
  4. Image titled Dress Vintage Step 4
    4
    Consider buying vintage-inspired pieces. Although not nearly as earth-friendly and story-filled, there are many stores that offer a selection of vintage-inspired but modern-made clothing pieces. These are a great alternative to true vintage, as you don’t have to worry so much about damaging them, they come in perfect condition, and they are already in a size guaranteed to fit you.

Part 2
Wearing Vintage

  1. Image titled Dress Vintage Step 5
    1
    Choose a few vintage tops. Vintage shirts from nearly any era are the easiest way to step into the world of wearing vintage. Shirts and sweaters are relatively low-maintenance, and pair with any modern bottoms. Presently, it is very popular to pair a vintage top with skinny jeans and booties, alongside any other accessories you may want to add. You can also add a vintage cardigan or sweater to nearly any modern outfit without looking out-dated.
    • If you’re new to vintage, stay away from tops in the 70’s and 80’s, as these are still recent enough to look out of fashion if worn incorrectly.
    • You can easily buy a shirt or sweater that is too large and wear it with tight bottoms or a wide belt to make it look more flattering.
  2. Image titled Dress Vintage Step 6
    2
    Look for flattering vintage skirts. Vintage skirts generally fall into two categories: full length/maxi, or knee length/midi. Up until the 80’s/90’s, skirts weren’t socially appropriate unless worn at the knee or below. In order to compensate for this length, make sure to wear a shirt that is clearly from 2000 or later. That being said, there is a huge variety of flattering vintage skirts on the market. Try styles like the circle skirt or an A-line skirt with tulle. Skirts are also easy to wear, as they don’t take much tailoring in order to be made to fit well.
    • Vintage skirts in any neutral tone (black, gray, brown, tan, and olive) are a great addition to your wardrobe.
  3. Image titled Dress Vintage Step 7
    3
    Try on a few pairs of pants for size. Vintage pants can be difficult to find, as sizing for pants has changed dramatically over the last century. Depending on how far back the pants were made, they may not even have a ‘size’ that we would recognize. However, if you are able to try on a few pairs and find some that fit, don’t hesitate at adding them to your closet! Try pairing vintage pants with a modern band tee or oversized knit sweater. Additionally, try tucking a lacy top or screen-printed tank for a bit of modern flare.
  4. Image titled Dress Vintage Step 8
    4
    Look for perfect vintage dresses. Vintage dresses are fun to wear, for the main reason that there is such huge selection of well-fitting dresses available for purchase. Be on the lookout for dresses that can be easily accessorized to be made modern in appearance. This means that dresses with lots of embellishment and adornments can look too costume-y for regular wear. Dresses that are solid color, a mild print, or in good quality fabric can be put with boots/flats/sandals, a cute beanie or wide-brimmed hat, and a few pieces of modern jewelry.[2]
  5. Image titled Dress Vintage Step 9
    5
    Try adding vintage hats and scarves to your outfits. Not ready to take the full-outfit plunge yet? It’s easy to add a small vintage piece, like a scarf or a hat, to a totally modern outfit. Look for vintage turban hats and wide-brim hats (currently in style) to add to your favorite modern outfit. Silk scarves can be worn around the neck, or wrapped up to create a retro-inspired headband. Just be sure that these are in good condition when you buy them, because they cannot be easily (or cheaply) fixed or cleaned.
  6. Image titled Dress Vintage Step 10
    6
    Keep an eye out for awesome vintage jewelry. Jewelry almost never goes out of style, so you can wear pieces of vintage jewelry without anyone knowing the difference. Look for big statement necklaces, bold bangles, and clip-on earrings for your outfits. Keep in mind that you don’t want your jewelry to be in competition, so only wear a single piece of bold jewelry at a time.
  7. Image titled Dress Vintage Step 11
    7
    Don’t forget about the shoes! Vintage shoes are one of the oft-overlooked pieces of vintage that can totally transform an outfit. The difficulty with vintage shoes, is finding a pair in good enough condition that they’ll be worth the purchase. Look for classic styles like lace-up boots and oxford flats (men’s or women’s!) to add to any modern outfit in your closet. When in doubt, stick to neutral tones in quality leather for a look that never goes out of style

How to be a 60's Girl.

You've always been love-struck by the sixties and wish you could be more like those sixties girls with the perfect hair, sweet smiles and nights out at the drive-in theatre... Well with a little help to get started, you may find the sixties girl within you blossom!

Part 1
60s Clothing

  1. Image titled Be a Sixties Girl Step 1
    1
    Get the clothes. The sorts of clothes appropriate to the 1960s include:
    • Small scarves around your neck over a cardigan sweater.
      Image titled Be a Sixties Girl Step 1Bullet1
    • Tight black skirts with slits up the back or sides, just above the knees.
      Image titled Be a Sixties Girl Step 1Bullet2
    • Plain or black nylons with garter belts and flat black shoes or penny loafers.
      Image titled Be a Sixties Girl Step 1Bullet3
    • Blazers and plaid skirts, pleated skirts, gathered skirts with crinolines.
      Image titled Be a Sixties Girl Step 1Bullet4
    • White blouses.
      Image titled Be a Sixties Girl Step 1Bullet5
    • Plain polo necks (in colours such as black or white, or maybe even something very vibrant!)
      Image titled Be a Sixties Girl Step 1Bullet6
    • Wear mini skirts.
      Image titled Be a Sixties Girl Step 1Bullet7
    • Wear A-line dresses with wild flower patterns. Remember flower power was "in" in the late sixties.
      Image titled Be a Sixties Girl Step 1Bullet8
    • Tunics and shift dresses.
    • Skinny trousers.
    • Paper dresses.
      Image titled Be a Sixties Girl Step 1Bullet10
  2. 2
    Choose the clothing style you like the most, or mix it up for different times. Some choices include:
    • For the sophisticated 'work-look', try a nice, pastel polo-neck with light-colored skinny trousers and vintage-looking heels or flats.
    • For a normal couldn't-be-bothered everyday look, choose skinny trousers and a cool tunic over the top, with pin-heeled shoes.
    • For a fun, cute look, choose bright mini-dresses and mini-skirts teamed with frilly blouses and pin-heeled boots! Also, use high-waisted shorts - either plain or print - with bright opaque tights and a frilly blouse tucked in, along with flats. For accessories, choose bright tights, lots of bangles and Alice bands.

Part 2
DIY clothing improvements

  1. Image titled Be a Sixties Girl Step 5
    1
    Embroider jeans or vests. Wear them. The peace symbol was very popular.
  2. Image titled Be a Sixties Girl Step 6
    2
    Letter sweaters from your "jock" boyfriend and always a "friendship" or class ring around your neck hanging on a gold chain.

Part 3
Accessories

  1. Image titled Be a Sixties Girl Step 1Bullet9
    1
    Wear peace and/or love necklaces, earrings, etc. The sixties was the peace and love decade.
  2. Image titled Be a Sixties Girl Step 3
    2
    Purchase or make love beads. Wear them with a pair of bell bottoms and sandals for the hippie look which was fashionable until the mid seventies.
  3. Image titled Be a Sixties Girl Step 4
    3
    Wear headbands.

Part 4
Looking like a 60s girl

  1. Image titled Be a Sixties Girl Step 7
    1
    Get the hairstyle. Bouffants were quite popular among the older women, while teens girls preferred sleek straight hair and headbands.
    • The bouffant is much easier to tackle with shorter hair (shoulder length). See How to Tease Your Hair for help on achieving the bouffant.
      Image titled Be a Sixties Girl Step 7Bullet1
    • For headbands: Go for a relaxed, well-combed loose look, with an added neon thin headband worn like a hippy would, not on top of the head, but surrounding the head. Try out some pretty fabric-covered thick headbands too.
  2. Image titled Be a Sixties Girl Step 7Bullet2
    2
    Do an elegant hairstyle. Many women imitated Jackie Kennedy's hairstyle with her hair softly brushing her shoulders and flipping up at the end under a pillbox hat. Use a straightening or curling iron to flip up the ends of your hair if you do choose this look.
  3. 3
    Try out a beehive for swinging 60s style. Back-comb the crown and leaving the front natural.
  4. Image titled Be a Sixties Girl Step 8
    4
    Use makeup:
    • For eyes: These will be your most accented asset. Apply a white translucent base as eyeshadow, filling the crease with a dark shade eye-shadow. Line the top lash line with black liquid liner, make it slightly thicker on the outer corner and finish with thick mascara or false lashes.
      Image titled Be a Sixties Girl Step 8Bullet1
    • Use liquid foundation and powder to achieve perfect skin with little or very light pink blush.
      Image titled Be a Sixties Girl Step 8Bullet2
    • Try nude lips for something basic and true to the time.
      Image titled Be a Sixties Girl Step 8Bullet3
    • Or, add makeup for a pretty pout. All you need is lipstick (optional), Vaseline, lip balm and lip-gloss. Apply the Vaseline and leave for a couple of minutes, so that it soaks in. Now your lips will be softer. Add some flavoured lip balm, just to make sure, and let that sink in too. If you're going to a party, apply some ruby-red lipstick, or if not, miss this out. On top, use some sparkly or clear lip-gloss with a flavour.

Part 5
Immersing yourself in 60s culture

  1. Image titled Be a Sixties Girl Step 2
    1
    Listen to The Beatles, Rolling Stones, Doors, Kinks, Byrds, Monkees, Animals, Who, Manfred Mann, Small Faces etc etc etc. Choose your favourite 60s band or singer and purchase ALL the memorabilia and fan items you can.
  2. Image titled Be a Sixties Girl Step 9
    2
    Know popular terms used in the sixties such as:
    • "a gas"- A blast or a good time.
    • "bag"- Often referred to stealing.
    • "fab" describing something that is very good and 'cool', shortened version of fabulous.
    • "ape"- Going ballistic or becoming irate over a situation.
    • "Far out"- Excellent, cool, great.
    • "Hacked"- Mad, furious, upset.
    • "Heat"- Cops/police.
    • "Bookin'"- Going very fast, as in a car.
    • "Cat"- A guy.
    • "Square"- An uncool type of person.
    • "Bouffant" (any pouffe hairstyle).
  3. Image titled Be a Sixties Girl Step 10
    3
    Listen to popular music of the sixties. "The Beatles," "The Monkees," "The Rolling Stones," "The Who," "Lowrider Oldies," "The Mamas & the Papas" and "The Archies" will get you going in the right direction!
  4. Image titled Be a Sixties Girl Step 11
    4
    Familiarize yourself with sixties-inspired films. Some examples include: Breakfast at Tiffany's, The Pink Panther, etc.
    • Find out more about the mods, the northern soul and the rockers by watching films like Quadrophenia and Soulboy.